Picture yourself at the grocery store in the checkout line. You forgot your reusable bags. Again. It’s OK. Don’t beat yourself up. You’ll bring them next time. Instead of just chucking that paper bag into the recycling bin, you can make a pattern from it that you can reuse over and over. This is also an opportunity to upcycle some old clothing, towels, and linens. Using paper grocery bags for pattern paper is nothing new. My mom used this trick to make jams for my sister and me in the 1980s. I took off for Girl Scout camp one summer armed with about a dozen pairs of jams in varying patterns. Today, we’re going to make a simple cross body purse that can fit all your essentials.


Materials list:
- about ¾ of a yard of fabric of your choice. Denim and upholstery fabric work great
- light fabric for the liner like and old pillow case or sheet
- two strips of 44” long fabric. I’m using a necktie and corduroy for the lining, but it’s up to you
- magnetic closure
- light interfacing for the strap
- ¾ of a yard of heavier interfacing, fleece or felt to add structure to the body of the bag
- contrasting thread
Let’s get started:
Open the paper grocery bag up by cutting down the sides so you have two halves. Then cut open the corners so the paper will lay flat. I placed some spools of thread on the corners to help it lay down. I wanted the finished bag to measure 16” across the bottom, 12” at the top, with a height of 10” so I added an inch to all these dimensions for seam allowance. Check out the trapezoid in the photo.
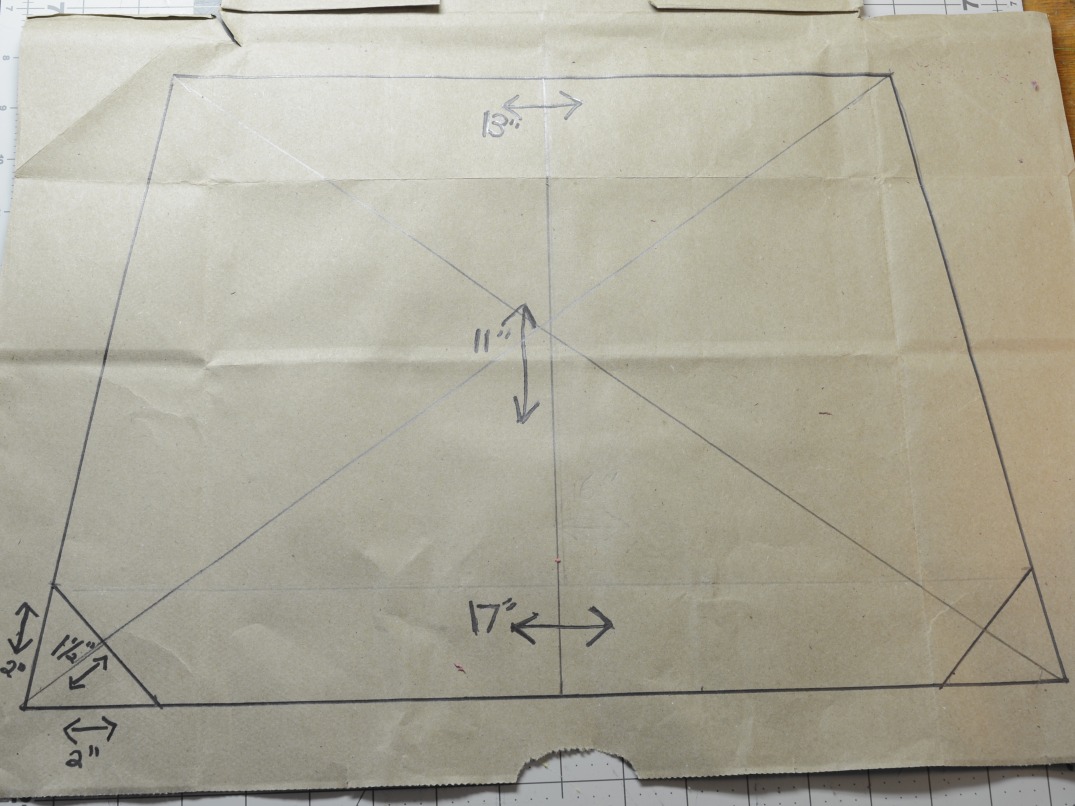
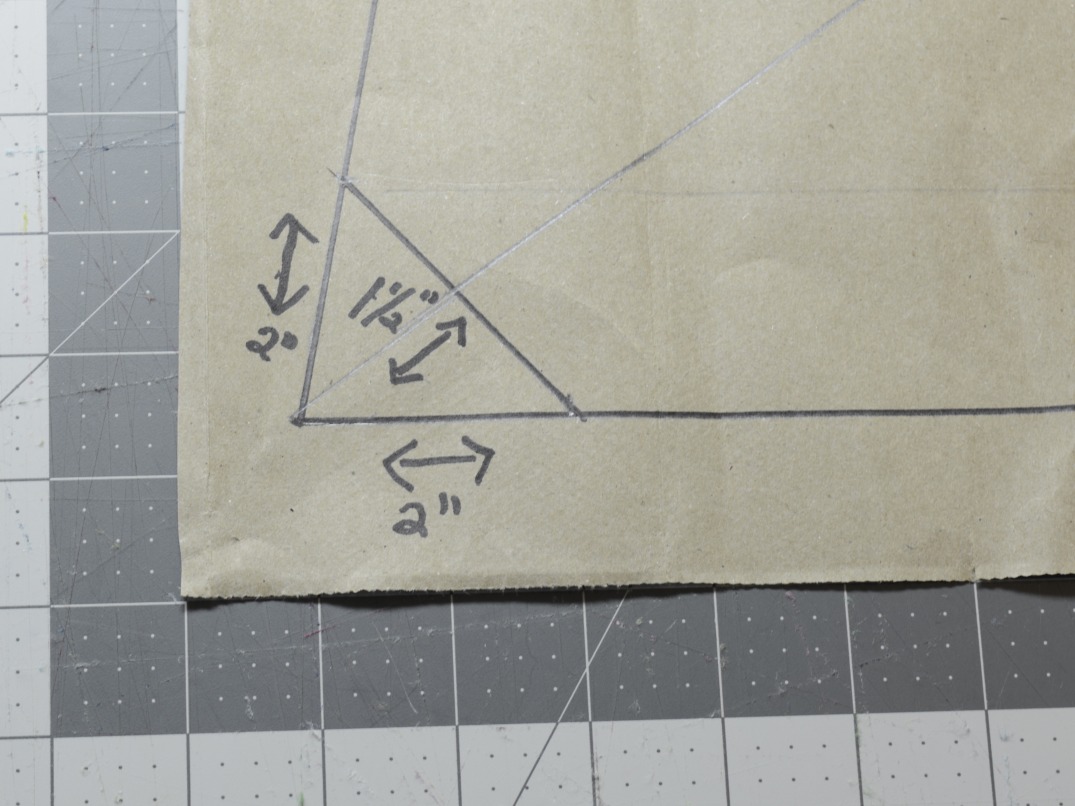
I wanted to add a little design element to the corners, so I measured 2” up the side and drew a straight line diagonally across the corner. Now I guess it’s a hexagon instead of a trapezoid if you want to get all geometric about it.
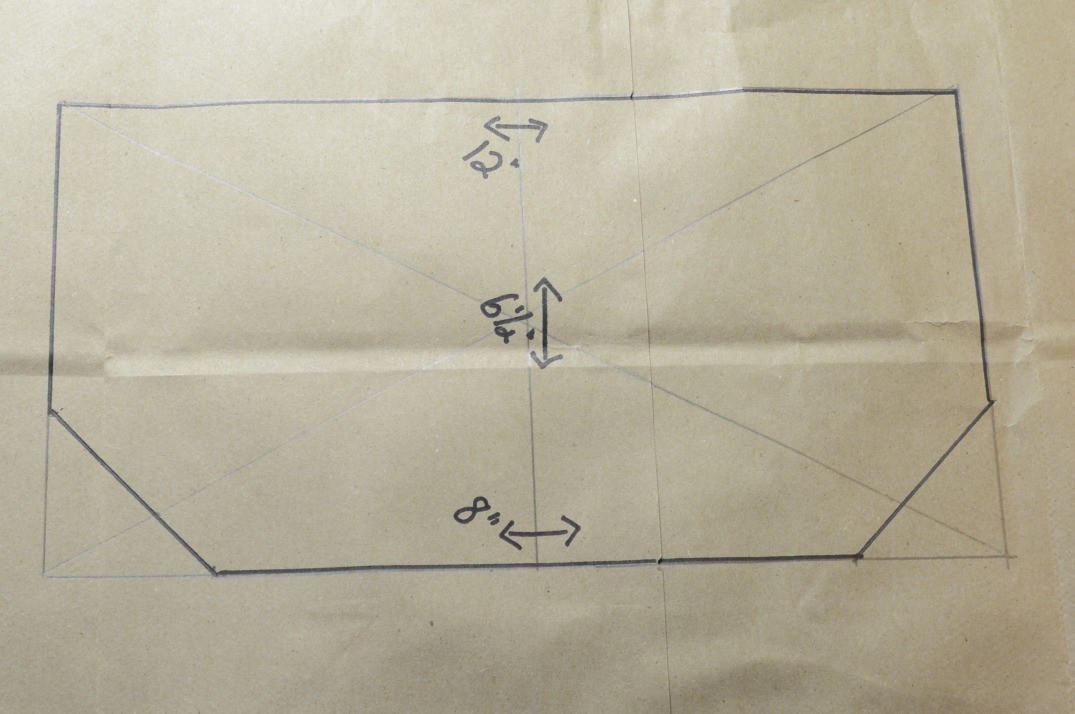
For the front flap, I drew a rectangle that was 12” across with a height of 6 ½.” Then I measured 2” from the bottom corners along the height and width and repeated the diagonal line across the corner to match the body of the bag. This should give you a width of 8” across the bottom.
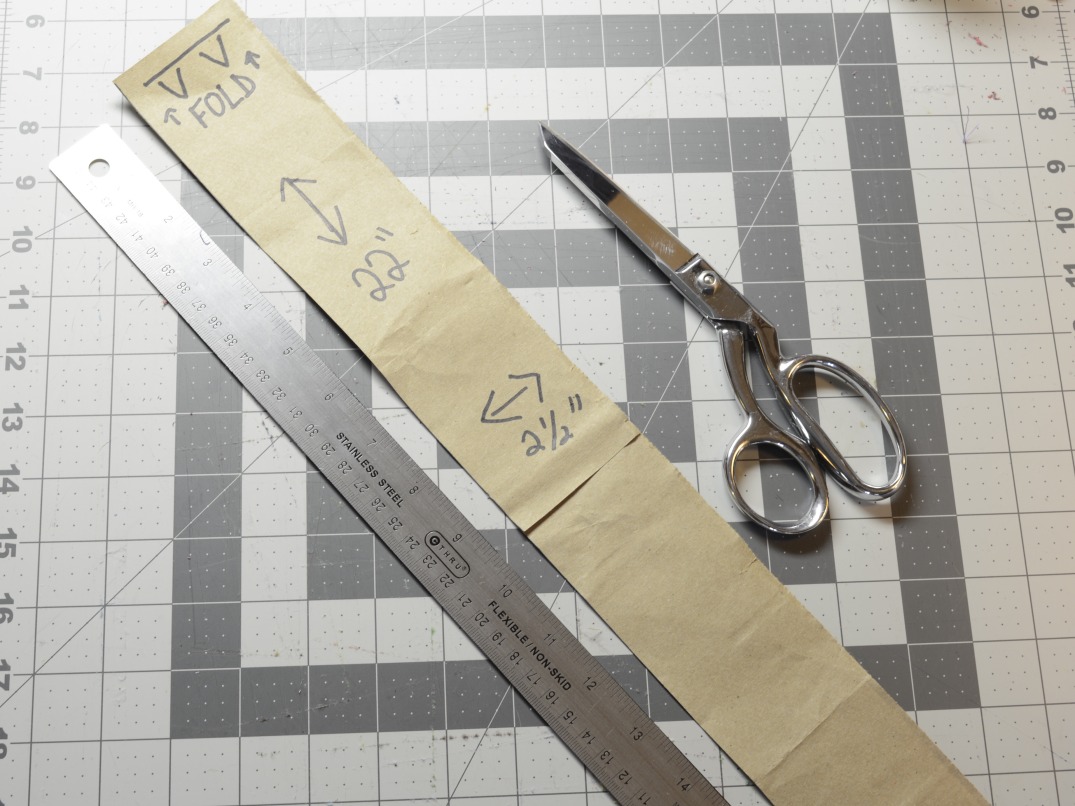
The strap is pretty easy. The final cross body strap will be about 42.” So the pattern piece will be cut along a fold. Measure along the top of the grocery bag piece and mark off 22.” I had to borrow a bit of paper from the second half of the bag and tape it on to get the final length. Make your strap pattern 2 ½” wide and don’t forget to mark the fold on one end to remind you that this piece will be twice the length of the pattern when it’s time to cut the strap fabric.
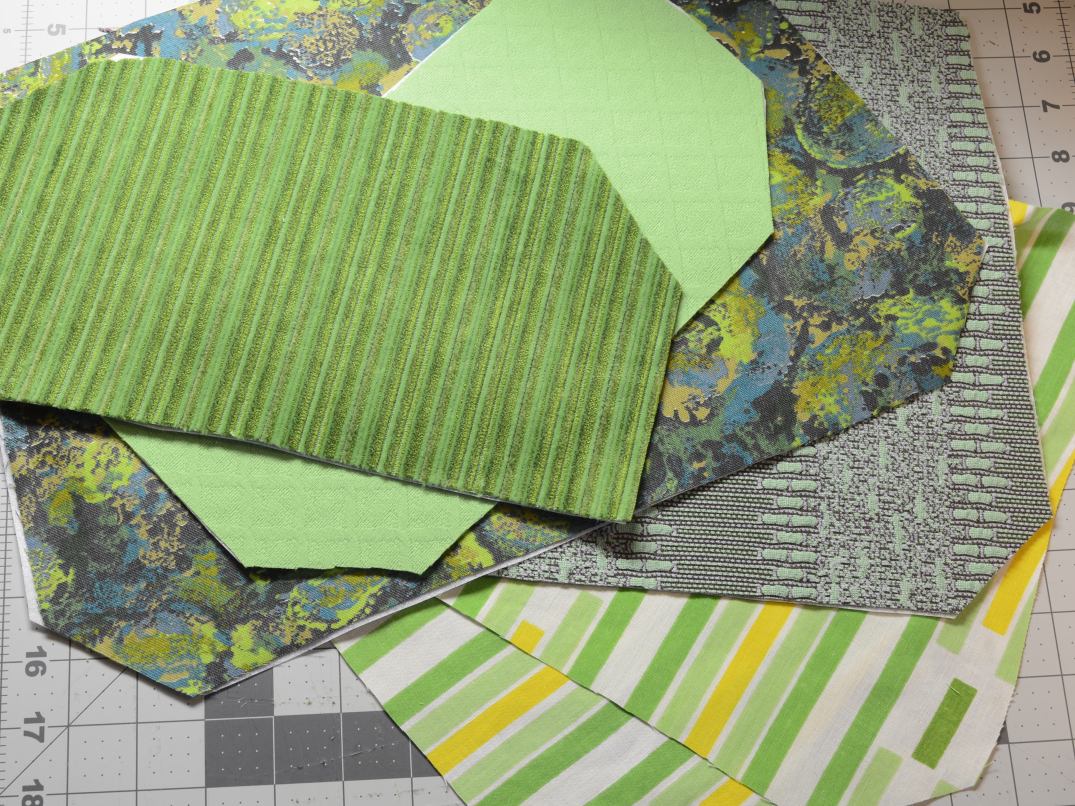
Cut out your three pattern pieces from the paper bag and select your fabric. I made mine with different pieces of fabric because it’s kind of a thing with me. Here is your cut list:
- Body of bag: Cut two pieces for the exterior, two for the lining and two pieces of interfacing.
- Front flap: Cut two pieces for the flap and two pieces of interfacing.
- Strap: One piece for the outside of the strap and another for the lining. I suggest corduroy of something that will be comfortable on your neck. Also, you will need two pieces of light interfacing. Make sure it’s pliable because you will need to turn the whole length of the strap inside out.
I like to use vintage neckties for the strap fabric, so I will show you how I do that. First, take out the seam with a seam ripper and remove the guts of the tie. If you have a cool tie tag, you might want to keep it and sew it to the strap because it looks cool. I had no tie tag, so I omitted this step. If you want, you can hand wash the material and let it dry. Now press the fabric out with an iron on a lower setting. Be careful you don’t scorch the fabric. I’ve melted some Dacron Polyester with my iron, so use care and don’t become a statistic.
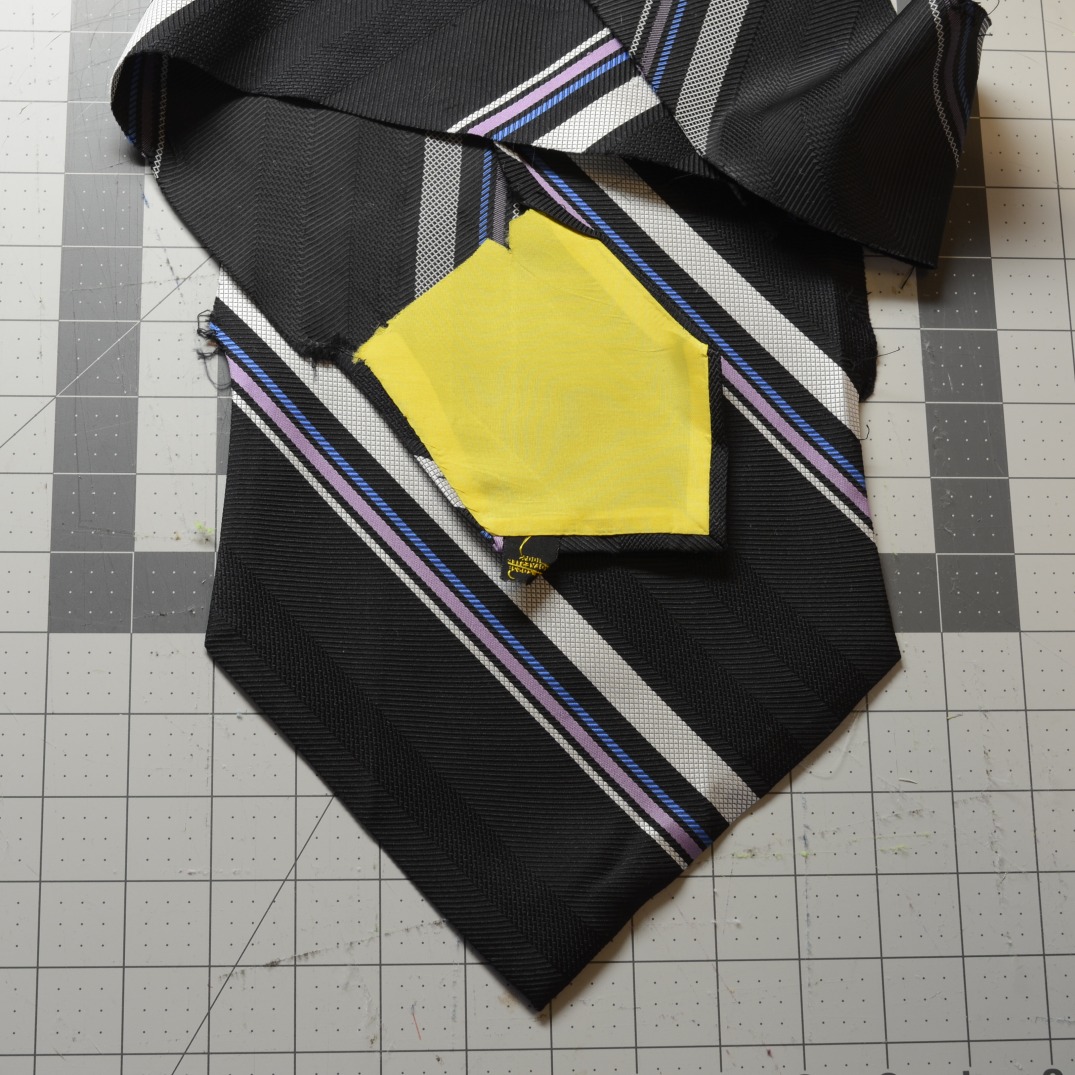
I cut the bottom of the tie off so I can use it as a pocket on another project. Pin the pattern to the material on the fold and cut. Repeat with the liner fabric. I’m using purple corduroy for the lining. I also used some lighter fusible interfacing on each side of the strap.


Back to the body of the purse:
Fuse or sew the interfacing onto all of your flap, strap and body pieces.
Now it’s time to pin and stitch!
Pin the flap pieces, lining, strap and body pieces right sides together.
Stitch the flap and body pieces together leaving the top of the flap and body open. For the strap, stitch on both sides. To make it a bit easier, sew both sides in the same direction on the machine to avoid the material pulling in two directions. Trim the excess fabric from around the seams and on both sides of the strap leaving about ¼.” This will help everything look nice when you flip the pieces right side out.
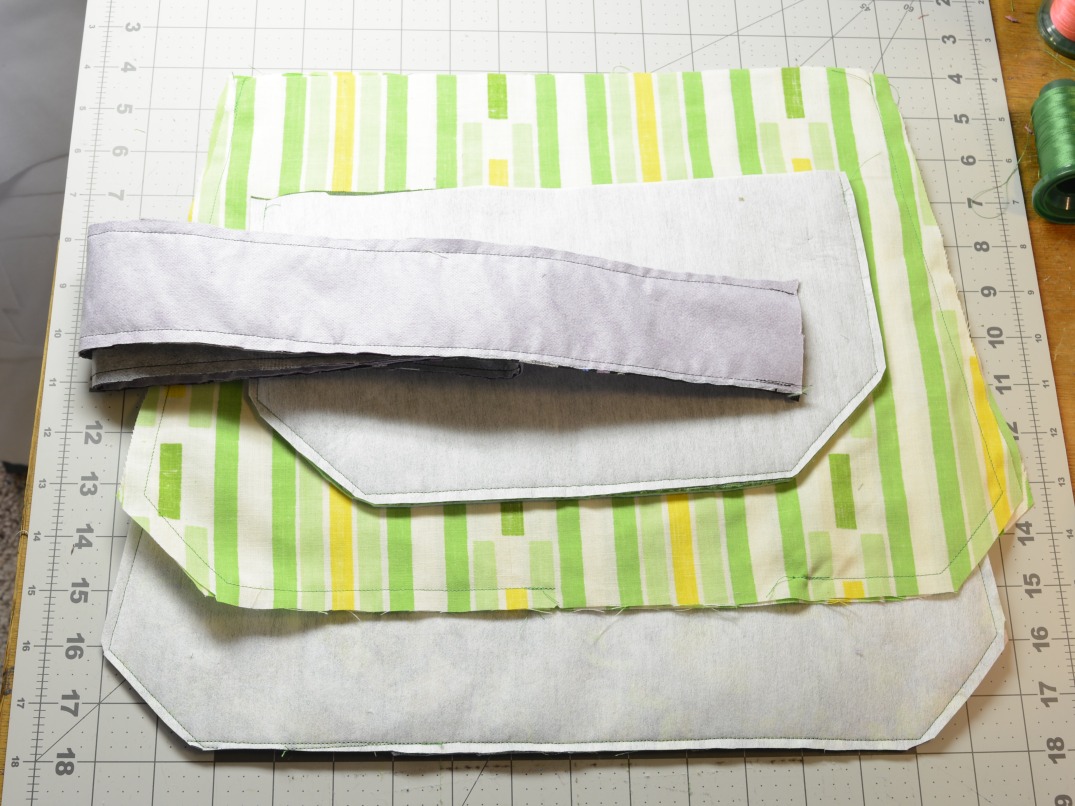
The liner is a bit different. Sew it just like the body pieces, but leave about 4” open on the bottom and back stich on either side of the opening. In one of the final steps, we’re going to pull the whole purse out through this hole, so don’t forget to leave the opening. Sometimes, in my haste, I forget and sew the whole thing closed. You may find it helpful to place pins sideways to remind you to stop sewing for about 4” along the bottom.
Flip the body, flap and strap pieces right side out and press.
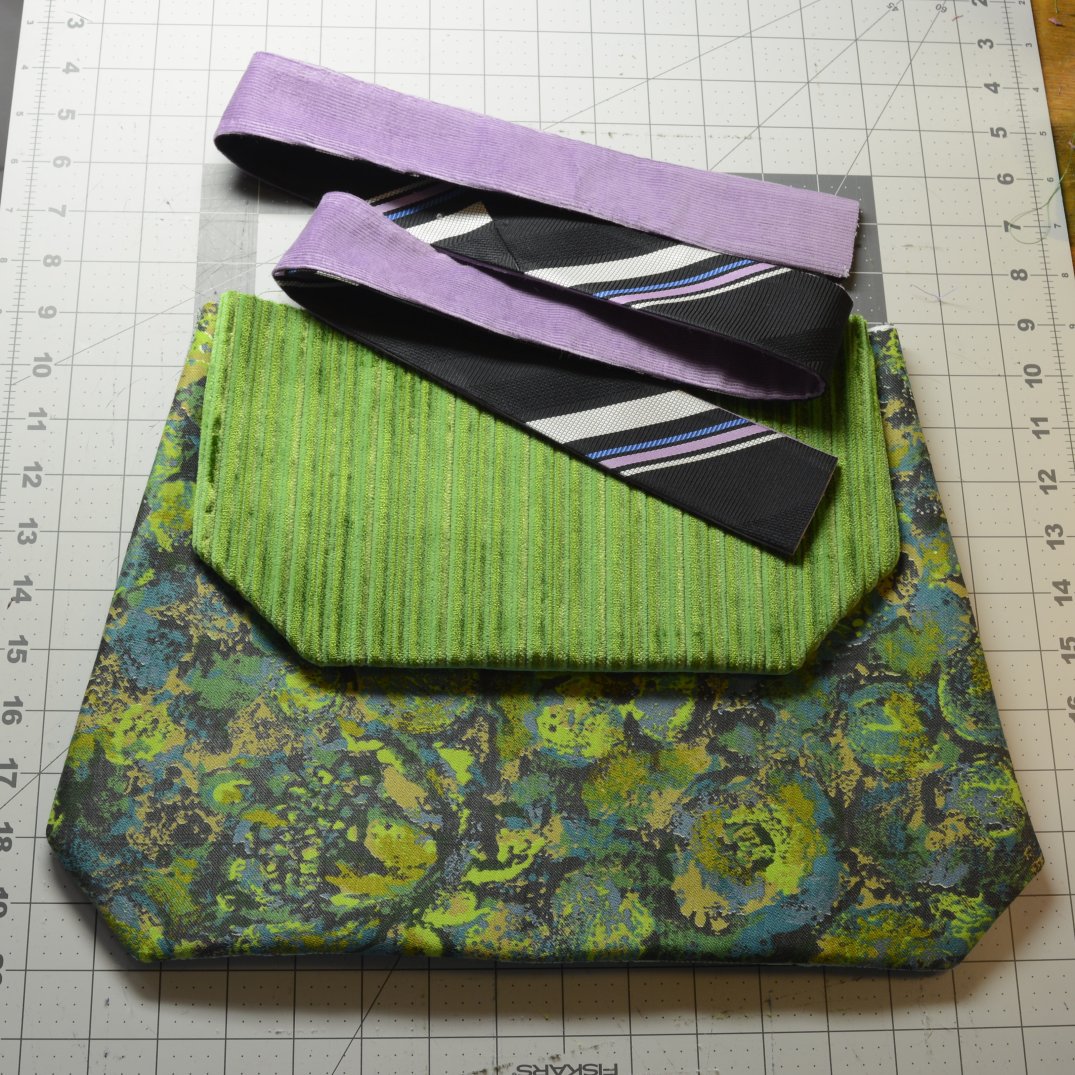
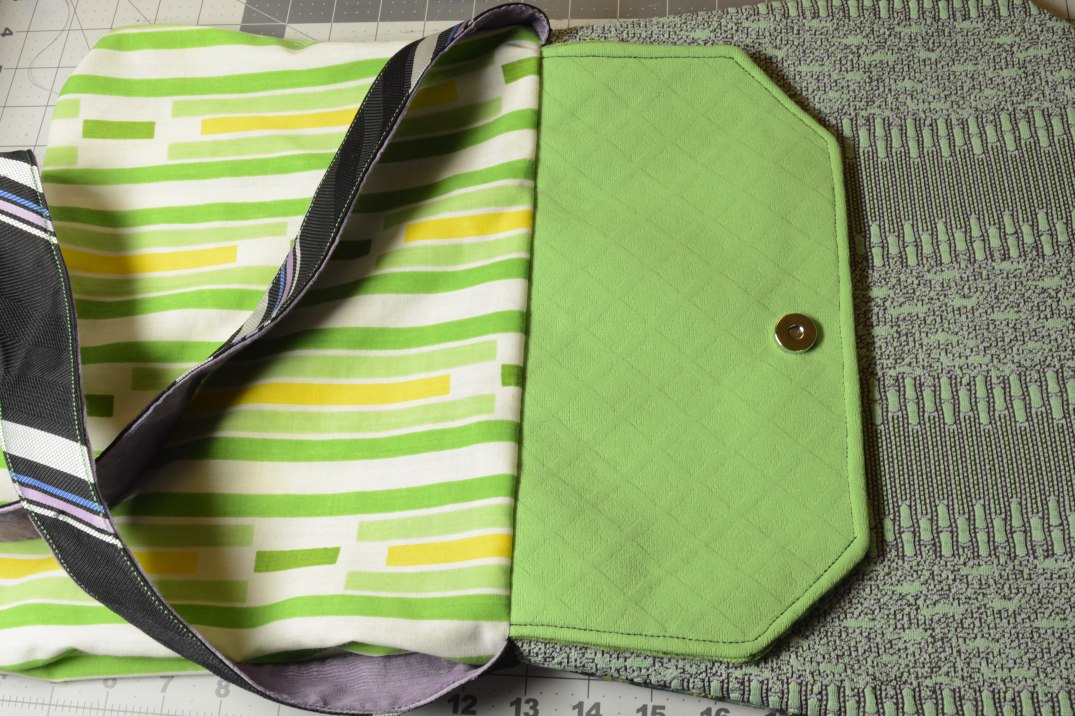
This next step is optional, but I think it looks nice. Top stitch along the sides of the strap and the edge of the front flap. I chose a green thread for this. The color is called “cilantro.” Yes, I did buy this thread because the color was called cilantro.

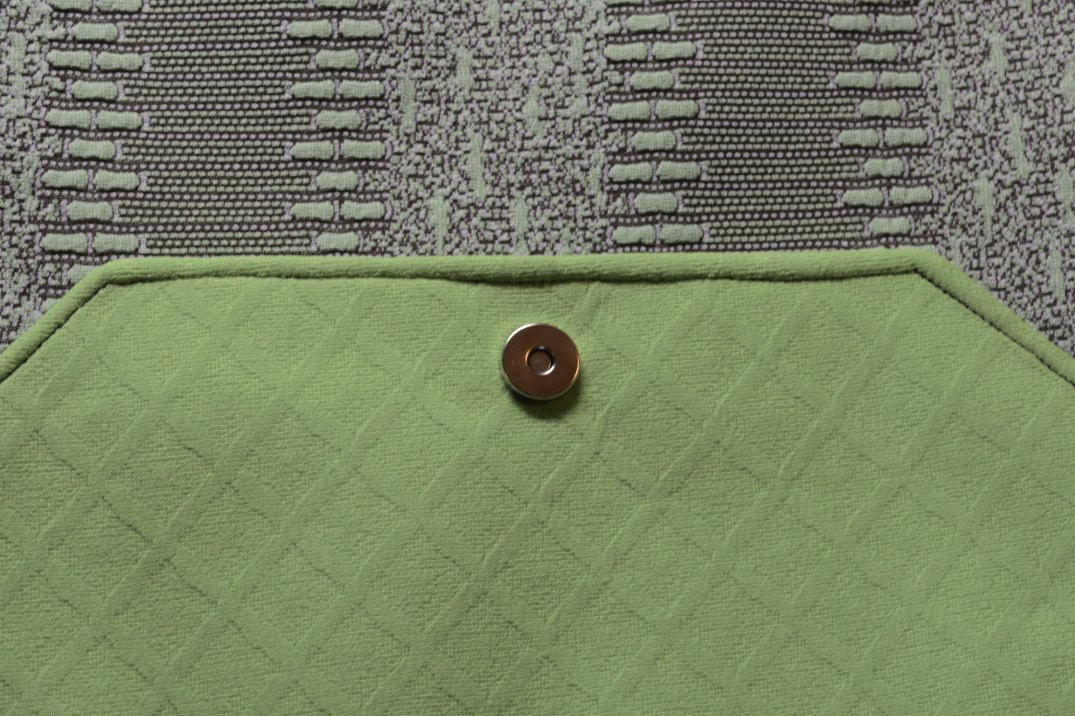
Fold the front flap in half vertically and mark a dot with a pencil on the underside. Place one side of your magnetic closure on the dot and put two more marks where the prongs sit. Reach inside the flap between the layers of interfacing and cut two ¼” slits with a seam ripper. Insert the magnetic closure prongs through those slits and place the retainer piece on the prongs and push them over with your thumb. That was easier that you thought, right? Save the other half of the closure for later.
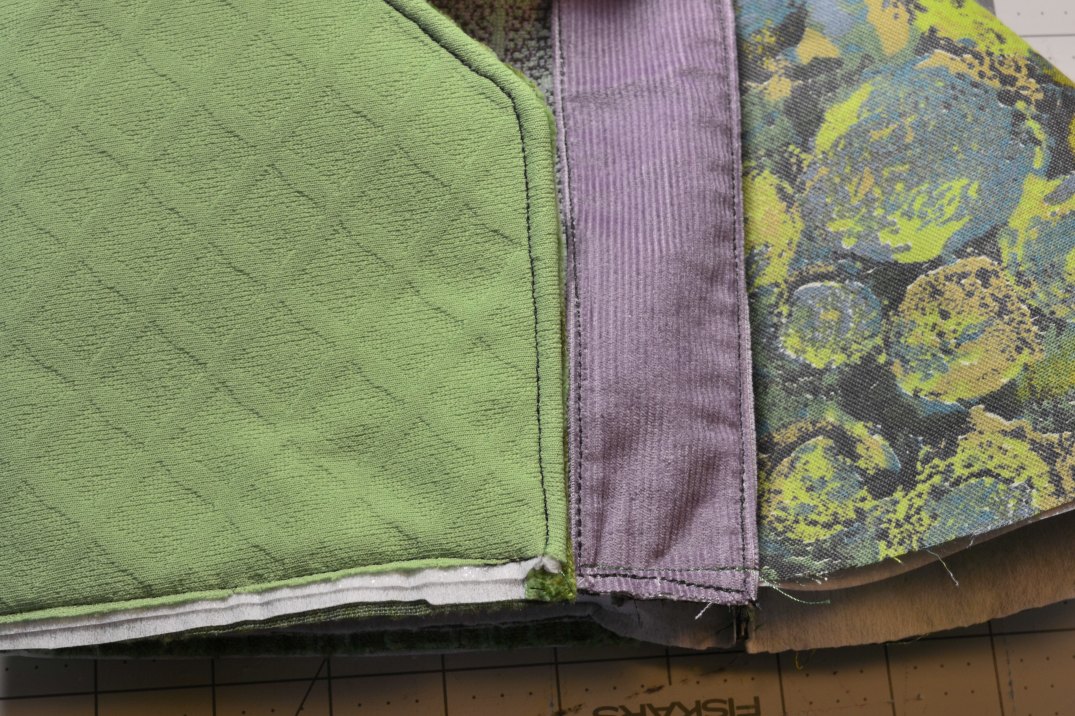
Now set your machine to a longer stitch and attach the flap to the body, placing the top against the back of the bag. Place the strap on the sides with the top of the strap against the outside of the bag. It should look like this:
Did you mess it up? It’s OK. That’s why I use a longer stitch. Often, I have to remove this seam and move the flap or strap around to get it just right and the longer stitch makes this easier.
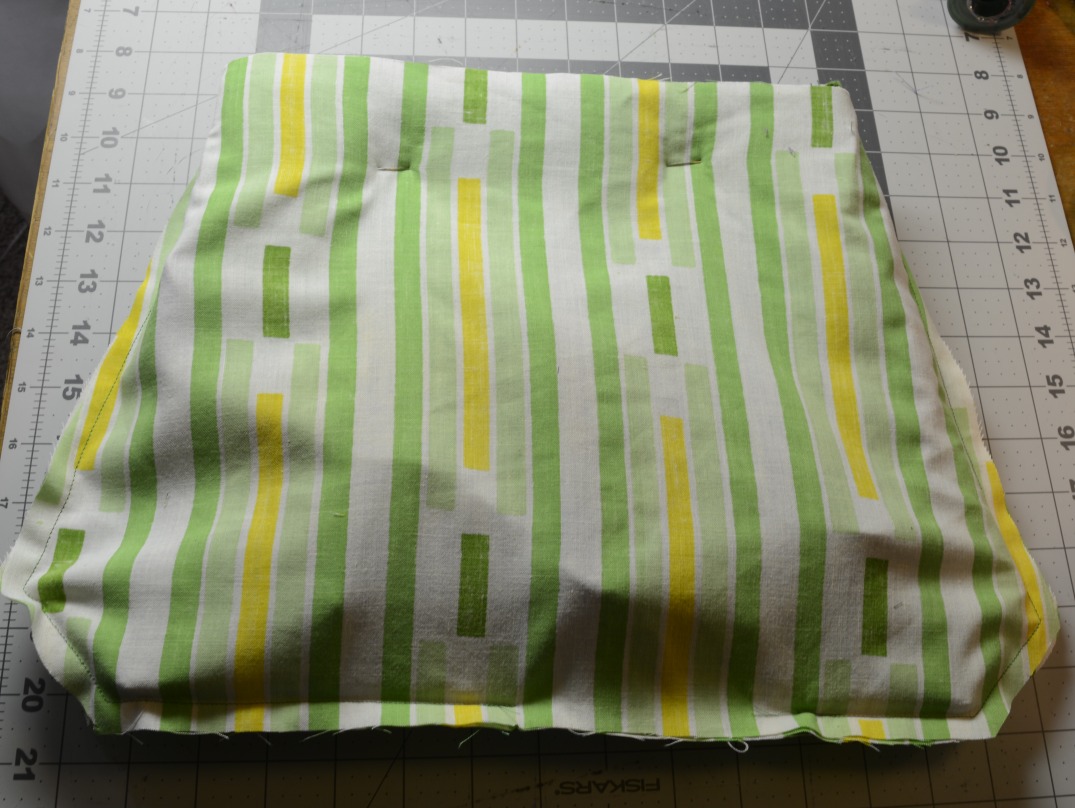
So here is where it gets tricky. Time to flex your spatial thinking skills. Tuck the whole bag into the liner, keeping the flap folded back and the strap folded against the body of the bag. Refer to the photo.
Turn the stich length back down on the machine and sew the lining to the body of the bag. Remember that hole we left in the lining?
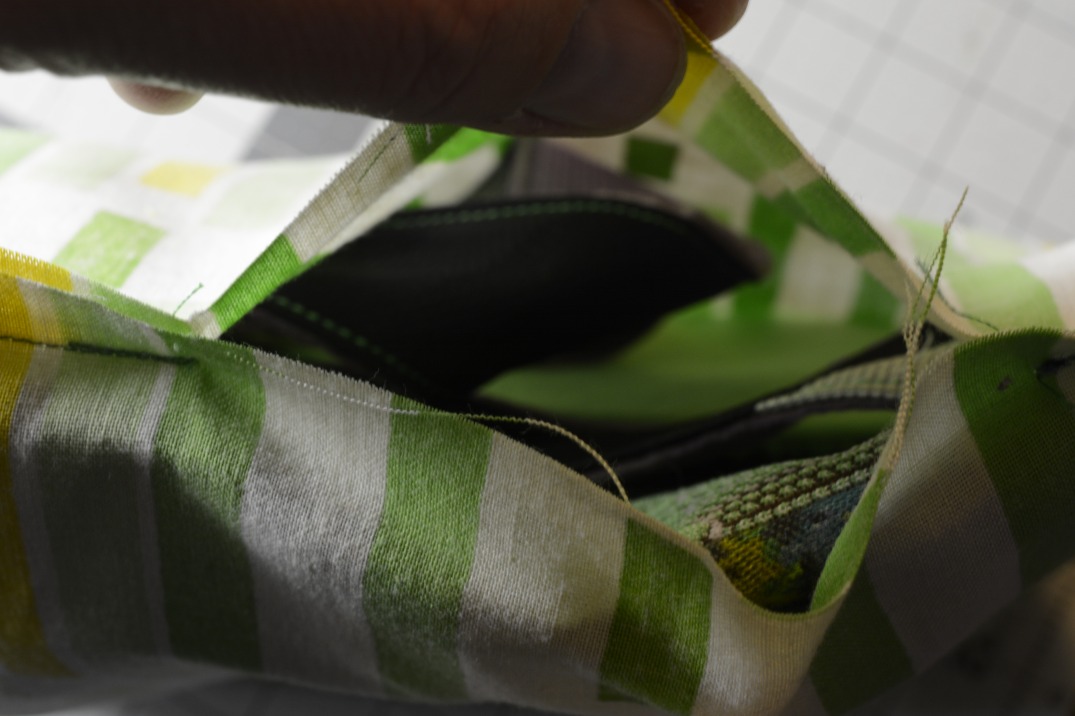
Pull the whole bag through that hole and check to make sure the liner is stitched securely to the body, then tuck it into the bag. Does it look OK? I hope so. We’re almost done.
Top stitch along the top of the body to keep the liner tucked inside neatly. Now it’s time for the other half of that magnetic closure. I put the two pieces of the closure together and mark where the prongs sit on the body with a pencil. Reach up through the hole in the liner to hold the fabric, and make two more ¼” slits with your seam ripper. Put the prongs through, place the retainer over the prongs and push the tabs over. Now you can sew that liner hole shut.


You’re done! Now you have an upcycled purse you can throw a few essentials in and take off to the grocery store. Who knows, maybe this is just the thing you need to remind you to snatch the reusable bags from the trunk of your car before you head inside. Think of it as a sort of upcycled “string around your finger.”

Thanks for reading and following my blog! If you have any questions or suggestions about how to make this pattern better, leave me a comment! I love comments!

Awesome!! Thank you for the tutorial, and the bag looks super nice with those neckties and fabric scraps 💚
LikeLiked by 1 person
Thank you! I appreciate the follow and the thoughtful comment!
LikeLike